Whether you are staying on BLM land or a campground, you will most likely be on uneven ground. Campervan or RV has to do the necessary leveling and stabilizing to make the living comfortable. There are a couple of options available to overcome the uneven ground, but first, let’s look at the differences between the leveling and stabilization.
Table of Contents
What is the campervan leveling
Leveling a campervan brings the unit to a nearly flat position from side to side and front to back for a long comfortable halt. There shouldn’t be any slip-off items from counters or tables or water pooling at the high end of the shower pan.
What is campervan stabilizing?
Stabilization of a campervan is to reduce unnecessary wobble in the unit by providing external support between the frame and the ground.
It’s necessary to use the correct tools to achieve both leveling and stabilization since using an incorrect tool will cause damage to the campervan, and there could be some safety issues.
Why are campervan leveling and stabilizing important
Mainly there are three reasons to level and stabilize the campervan properly.
- To plumbing work correctly.
- To get an accurate reading on tank levels.
- Some people may feel nauseated due to the wobbling, and others may be unable to sleep due to the slant.
What are the available leveling options?
The natural choice is to obtain something from the surrounding, such as a firm wood slab or rocks. This option might be the most cost-effective, and you won’t have to carry anything. However, you might not be able to accomplish 100% comfortable leveling.
So most reliable options are
- Hydraulic Leveling Systems
- Leveling Blocks
- Inflatable tire levelers
Hydraulic Leveling Systems
This option is the most convenient choice, but it is also the most costly. As a part of this setup, four hydraulic jacks will install in the undercarriage close to the wheels. The hydraulic pump, oil reservoir, and control center will fit the campervan’s undercarriage towards the middle.
The mechanism will operate entirely autonomously, and the campervan will begin self-leveling at the press of a button on the remote controller. These systems can work manually as well. Some modern design comes with an inbuilt safety feature to prevent accidentally driving off with the jacks down.
These hydraulic leveling systems can effortlessly elevate a campervan or a class B RV without causing any problems with your belongings. Typically these systems will add roughly 110 lbs to 150 lbs weight to GVWR.
Before you begin, make sure to walk around the vehicle and check for any obstacles or hazards.
E&P is a European brand well known for building hydraulic leveling systems for campervans, but you can find those units in the united states as well.
Leveling Blocks
Leveling blocks are a common choice among leveling solutions. One of the cheapest options and has ease of storage, cleaning, and transportation.
Leveling blocks are available in a variety of styles and patterns. Some examples are stackable interlocking slats, ramp-style levelers, and curved levelers.
The majority of these blocks are constructed of plastic. They are lighter than porous materials like wooden and concrete blocks and do not break down when exposed to dampness on the ground daily.
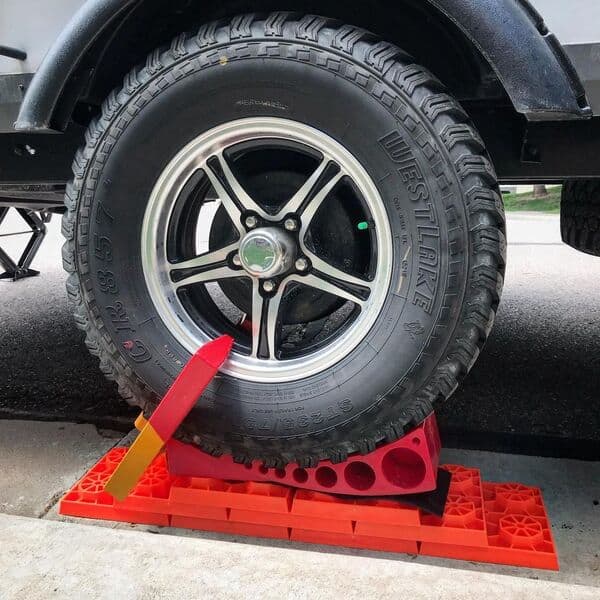
Curved levelers in the ramp design are often simple to operate. They can lift the vehicle by 4 inches and allow you to level the camper van without going in and out many times. Andersen Hitches camper levelers are well known in this category.
Interlocking leveling block slates are another alternative. Arrange them in a pyramid and drive the campervan onto the stack. One of the most significant advantages of these blocks is their ability to withstand more significant weight thresholds, such as 40,000 lbs. Although a fully equipped campervan isn’t particularly heavy, it may be an excellent option for leveling a fifth-wheeler.
One disadvantage of this design is that it lacks the progressive lifting capacity of curved levelers. A single slate will elevate you one inch. When stacking slates on top of one another, each step is a 1-inch increment, and you may need to rearrange all of the leveling blocks until you reach a desirable degree of leveling.
Inflatable Levelers
Inflatable levelers have been increasingly popular recently due to their ease of usage. Hydraulic leveling systems, as you may know, are the most user-friendly. However, most campervan dwellers cannot afford them because of the high cost.
On the other hand, stackable or curved plastic levelers are inexpensive, but you have to struggle to get the campervan into the proper leveling position.
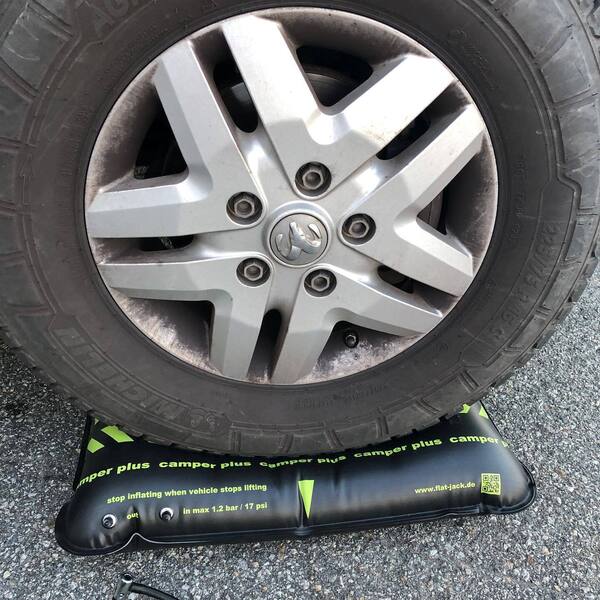
These inflatable airbag type levelers offer a far more convenient user experience for an affordable price.
In terms of usage, just lay them in front of the tier(s) you want to level. Make sure to remove any sharp objects or stones from the ground or place some protection underneath.
Then drive onto them and inflate using either an air compressor or a hand pump.
The Flat-Jack Air Tire Level is one of the famous inflatable levelers. A single Flat-Jack leveler can raise to 4.75 inches.
Another advantage is that these inflatable levelers are easy to store. Deflate it, clean it, and wrap it up. Then you may keep it in a tiny gap between seats and a wall or under a bed where there isn’t much else to do with it.
Benefits of using a permanent level indicator
As you are aware now, there are a couple of ways to raise each wheel in the campervan. However, this doesn’t tell whether the campervan is level or not. You’ll need to check with an indicator and adjust if necessary.
The simple bubble indication is the most widely used instrument. But the difficulty with this strategy is that you may need to tweak the levelers numerous times to reach the ideal heights.
Either you need two people to do the task, or you have to get down after each adjustment and measure the level in different places in the campervan to achieve a satisfactory result.
Fortunately, there are currently a few digital wireless level gauges on the market to make this process easier.
One of the most popular products is the LevelMatePRO Wireless Vehicle Leveling System. Install the device towards to center of the campervan and pair it with your phone after installing the relevant app. Then do the one-time setup for calibrating the device specifically to the campervan.
Open the LevelMate app when you want to level the campervan. Get the current reading and see which wheel(s) needs to raise to get a perfect leveling. Use the leveling blocks with the appropriate height and level the campervan until you satisfy the leveling.
These permanent level indicators help drastically reduce the time to level a campervan or RV. It takes a few minutes to level the camper using a hydraulic leveling system and these indicators since you can manually adjust the appropriate wheels precisely and quickly.
What are the available stabilizer options?
There are several types of stabilizer options available for typical RVs. However, when it comes to campervans, the possibilities are restricted due to ground clearance and weight concerns.
Full-width double stabilizers are popular among travel trailer and 5th wheel camper users due to their simplicity. However, installing such a stabilizer inside a campervan like a class B presents several complications.
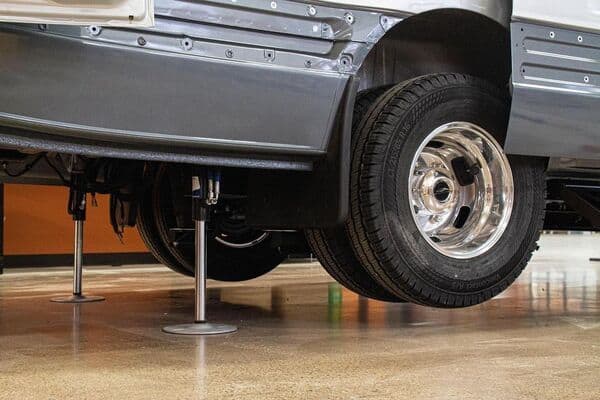
Screw jacks or scissor jacks are the most practical solutions when considering weight, storage space, etc. At least two jacks must be from both sides of the campervan to provide better stability. But higher is better.
The most important fact to remember regarding these stabilizer jack usage is that never use those to lift the campervan. These jacks provide additional support to prevent wobbling or swinging when you move inside the campervan.
Use these jacks to offer support from the ground to the campervan frame rather than lifting it since this might cause deformation to the structure or damage to the jacks.